Introduction to Android Studio project
Introduction to Android Studio project:
In this post, I will give you an overview of an Android Studio project. You can also watch the below videos :
1
2
Create a new project in Android Studio:
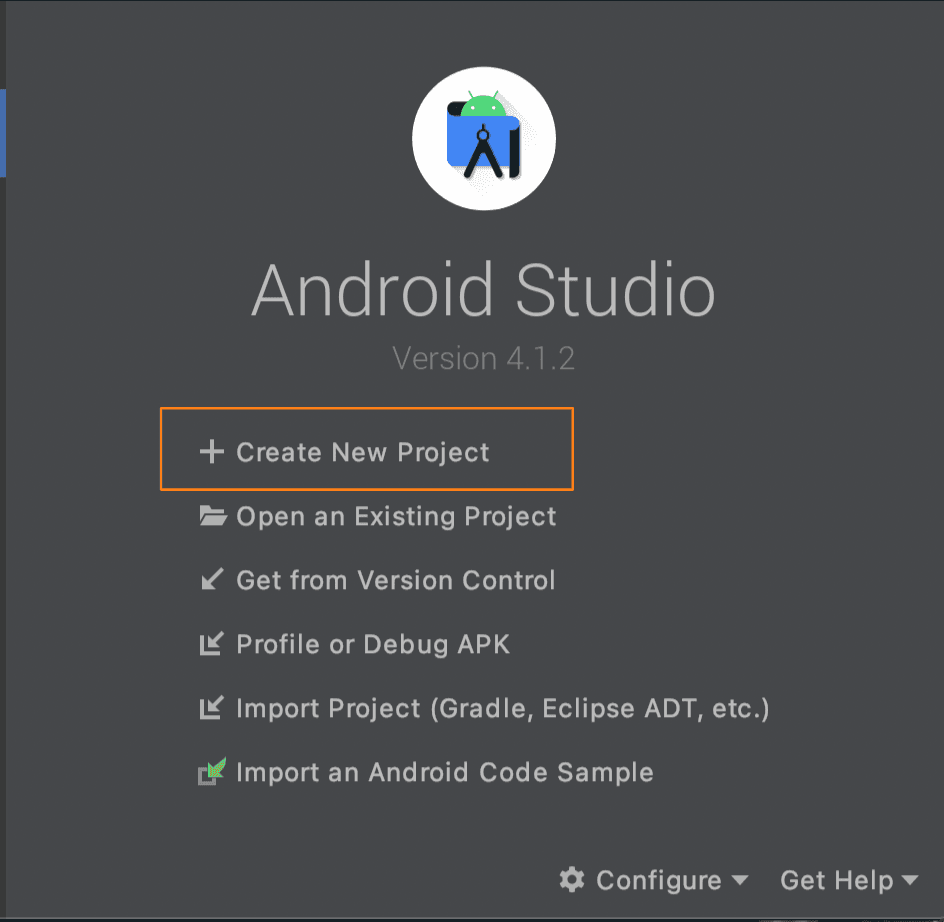
- Once Android Studio is installed, open it and it will show you a welcome screen as like below:
Click on Create new Project. It will create one new project.
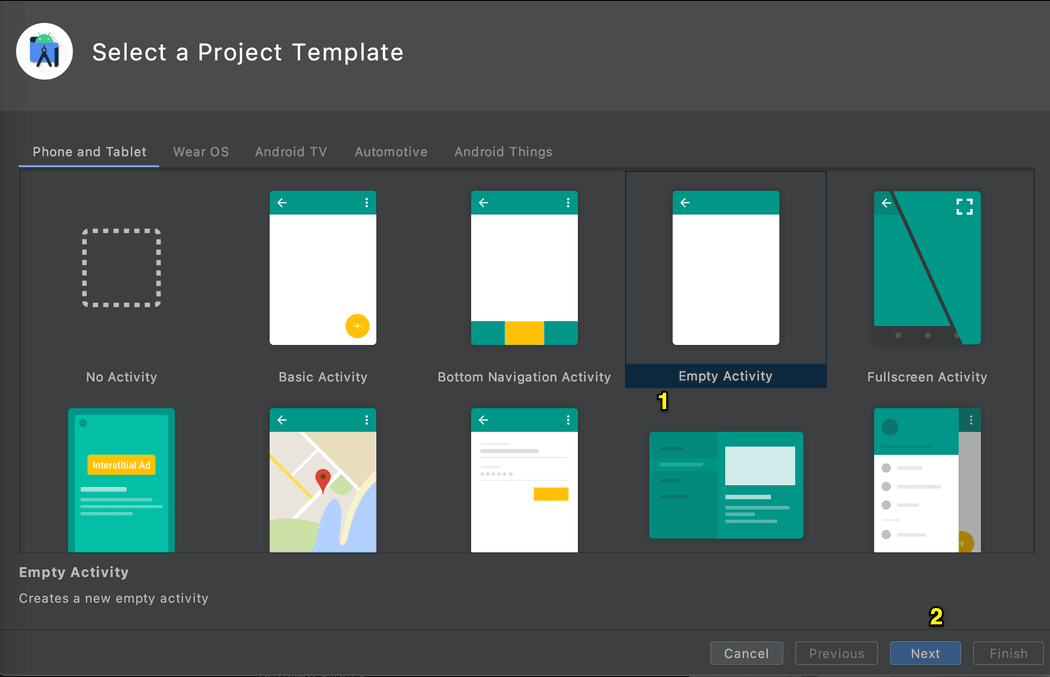
- It will show you to select one project template. You can start your project among these predefined templates. For now, let's select Empty Activity. It will create a project with an empty screen.

Click on Next to move to the next screen.
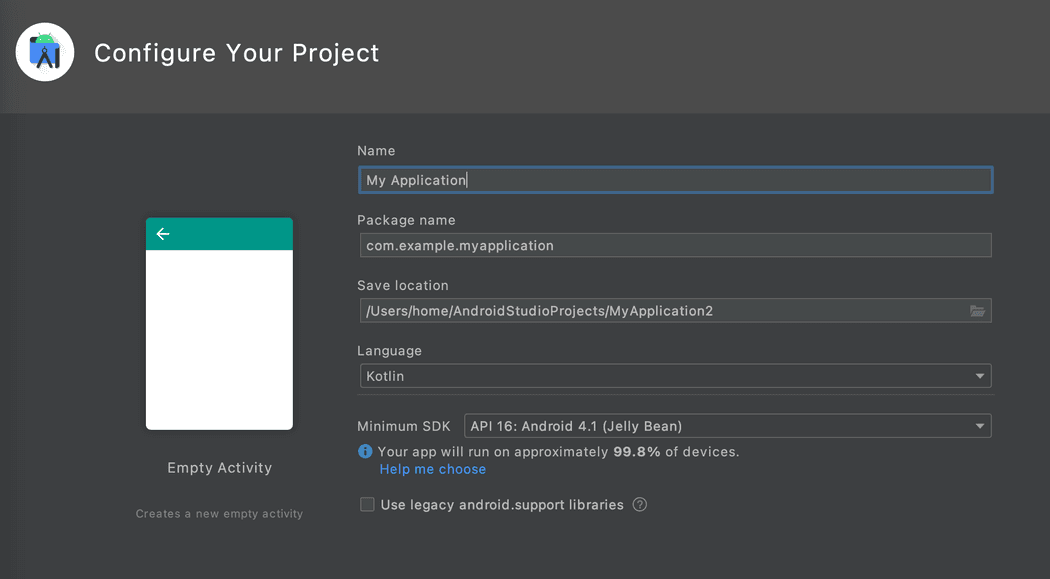
- Name is the name of the project
- Package name is the package name of the project. This should be unique and no other application should use this package name. Generally, com.domainname.appname is used for package name.
- Save location is the location to save the project files
- Language is the language to develop this application
- Minimum SDK is the minimum SDK version that we are targeting.
Once everything is entered, click on Finish to create the project.
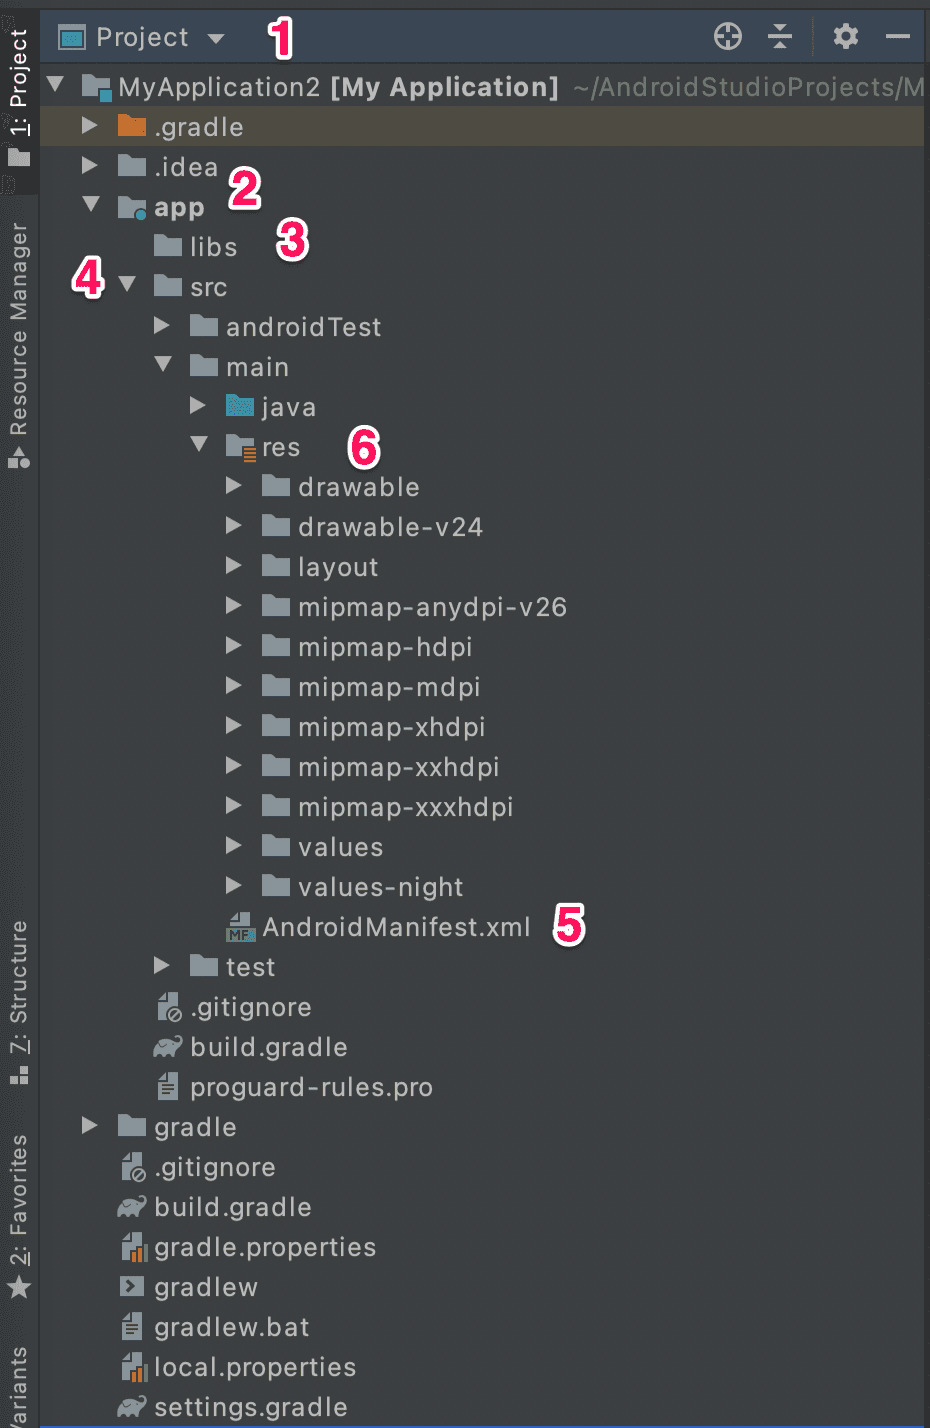
- 1) Make sure to select it as Project
- 2) The app folder holds all app-related code files and resource files
- 3) The libs folder is for an external jar, aar libraries
- 4) src folder holds all source code files. MainActivity is the activity file, this is the file responsible for showing a screen in the app.
- 5) AndroidManifest .xml file holds declaration of different components of the app. It includes information like permissions, minimum API level, hardware/software features etc.
- 6) res folder is for holding different resources of the app like images, animation files, fonts, different layouts etc.
- 7) activity_main.xml file is used to design the screen of the MainActivity. In android, we use xml files to design screens. This is inside the layout folder.
- 8) To run the app, click on the device list menu and select your emulator or your device if it is connected. Next, click on the play button to run it on the device selected. If it is not showing anything, you can select AVD Manager to open the manager used for all virtual devices. You can create one virtual device there.
These are the basics of Android Studio features. Once you start developing applications, You can also watch the video on my YouTube channel to get a more clear understanding.


