Introduction to Activity configuration changes
Introduction to Activity configuration changes:
In this post, we will learn about activity configuration change. An activity can change its configuration during runtime. For example, if the user is changing the screen orientation, or if it moves to a multi-window mode, the activity is destroyed and one new instance is created.
During this configuration change, the activity may load different resources once it is restarting. It is same as like the activity is newly created. For example, we can have two xml files, one is for portrait and another one for landscape.
Why configuration change is important:
There are few things that we need to handle while configuration is changed. Since the activity is created newly, we can save the current state in an object and restore the data from that object once the restart is done.
In this post, I will show you how to handle configuration changes in an Activity.
YouTube Video:
You can also watch the below video if you prefer video over text:
Create a new project in Android Studio:
First of all, create one new project in Android Studio. This will hold only one activity file with one xml file for that activity.
In my project, the activity is MainActivity.kt and the xml file is activity_main.xml.
xml file:
In the layout, I am adding one Button and one TextView. The button is placed below the TextView. Below is the complete code for activity_main.xml:
<?xml version="1.0" encoding="utf-8"?><androidx.constraintlayout.widget.ConstraintLayout xmlns:android="http://schemas.android.com/apk/res/android"xmlns:app="http://schemas.android.com/apk/res-auto"xmlns:tools="http://schemas.android.com/tools"android:layout_width="match_parent"android:layout_height="match_parent"tools:context=".MainActivity"><TextViewandroid:id="@+id/textView"android:layout_width="wrap_content"android:layout_height="wrap_content"android:textSize="60sp"app:layout_constraintBottom_toTopOf="@+id/button"app:layout_constraintEnd_toEndOf="parent"app:layout_constraintStart_toStartOf="parent"app:layout_constraintTop_toTopOf="parent" /><Buttonandroid:id="@+id/button"android:layout_width="wrap_content"android:layout_height="wrap_content"android:layout_marginBottom="200dp"android:text="Click Me"android:onClick="onButtonClick"app:layout_constraintBottom_toBottomOf="parent"app:layout_constraintEnd_toEndOf="parent"app:layout_constraintStart_toStartOf="parent" /></androidx.constraintlayout.widget.ConstraintLayout>
- If we click on the button, it calls one method onButtonClick in the MainActivity.
Activity file:
The activity, i.e. MainActivity.kt looks as like below:
import androidx.appcompat.app.AppCompatActivityimport android.os.Bundleimport android.view.Viewimport android.widget.TextViewclass MainActivity : AppCompatActivity() {lateinit var textView: TextViewvar counter = 0override fun onCreate(savedInstanceState: Bundle?) {super.onCreate(savedInstanceState)setContentView(R.layout.activity_main)textView = findViewById(R.id.textView)}fun onButtonClick(view: View) {counter++textView.text = counter.toString()}}
- We have one counter variable initialized as 0.
- On clicking the button, it increments the value of counter by one and assigns that value to the textView.
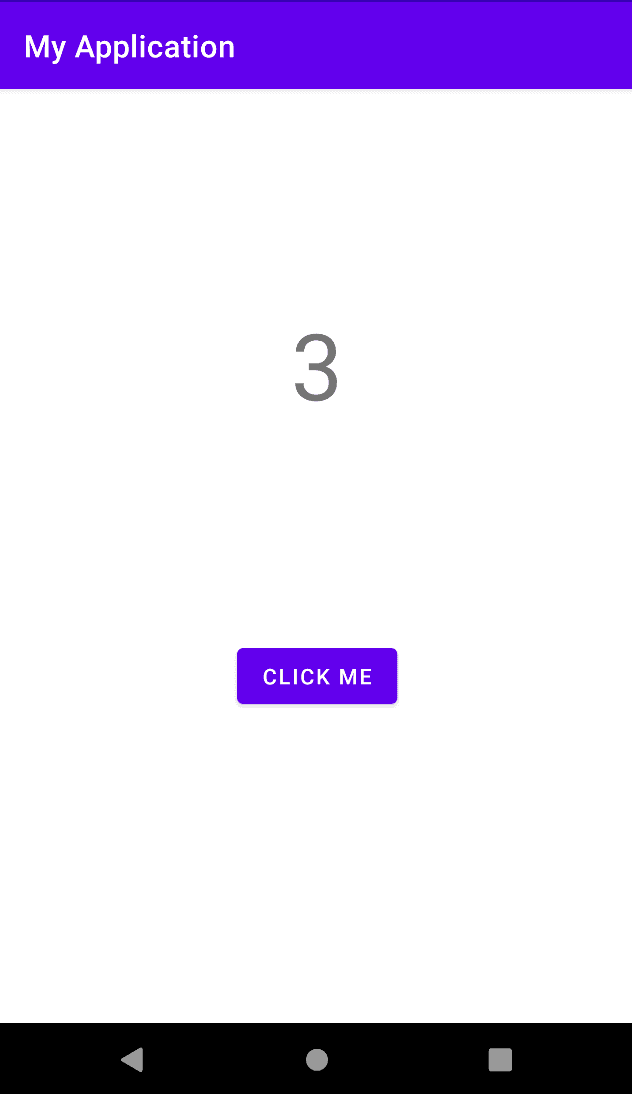
Now, if you start the app, it will look as like below:

If you click on the button, the counter value will increase.
Try to rotate your phone or emulator, it will be removed !
This is because the activity is recreated and all state in the activity is lost.
Handling activity configuration changes:
To handle activity configuration changes, we need to store the state of the activity, in our case the counter variable. We can store the current value of the counter variable and restore it once the activity restarts.
This can be done by using:
- onSaveInstanceState() method in the activity. We can use this method to save current state and restore it in onRestoreInstanceState() method. Both methods can be override in an activity.
- Using a ViewModel. class. This method I will show you in a different tutorial.
- Using a persistent storage, like we can write the data in the phone memory and restore it whenever we want.
In this post, we will learn how to do that by using onSaveInstanceState and onRestoreInstanceState methods.
How to use onSaveInstanceState and onRestoreInstanceState:
It is simple, just use the below two methods in the activity:
override fun onSaveInstanceState(outState: Bundle) {super.onSaveInstanceState(outState)outState.putInt("counter-key",counter)}override fun onRestoreInstanceState(savedInstanceState: Bundle) {super.onRestoreInstanceState(savedInstanceState)counter = savedInstanceState.getInt("counter-key")textView.text = counter.toString()}
- Inside onSaveInstanceState, we are storing the value of counter in the outState Bundle object. We are using key counter-key to save the state.
- We are restoring the value in onRestoreInstanceState using the same key.
The Bundle class provides different methods and we can store any type of data in it.
