Introduction to Fragment in Android Kotlin
Introduction to Fragment in Android Kotlin:
In this post, I will give you an introduction to fragment with a small example. Fragments are used to create a portion of UI interface. It is used to create flexible and reusable UI designs in Android.
Fragment has its own layout and we need to extend the Fragment class to create a fragment. It has its own lifecycle similar to an activity. Fragments are included in an Activity and its lifecycle is affected by the parent activity's lifecycle.
YouTube video:
How to create a fragment:
We have two different ways to add a fragment to an Activity. We can directly modify the xml file and add one fragment or we can add it programmatically.
Let's create one basic android project and add two fragments.
Add fragments in xml files:
Android Studio project:
Open Android Studio and create one new project with one activity MainActivity.kt and xml file activity_main.xml.
Now let's create two fragments. We need to use a similar approach like creating an activity.
For that, right click on your package name, click on new -> Fragment and select Fragment(Blank).
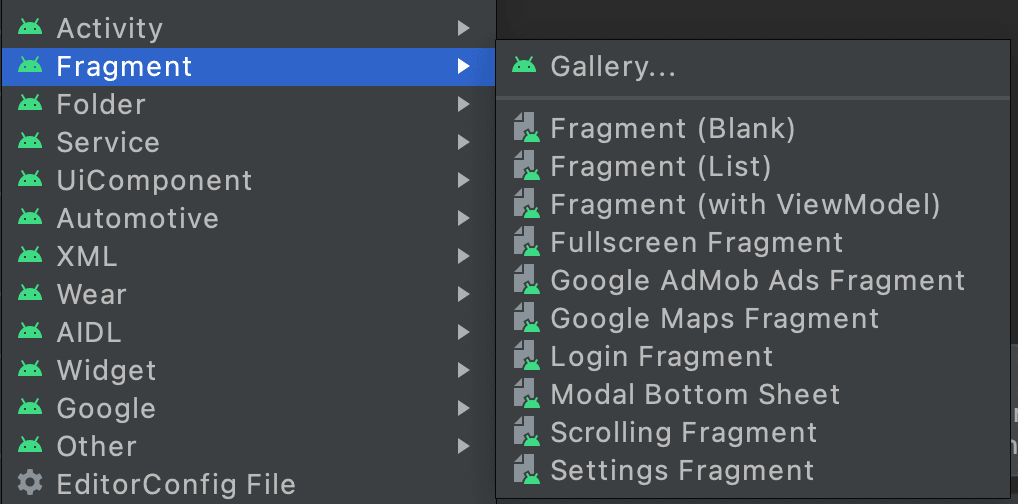
Add the name as FirstFragment and layout as fragment_first. Similarly, create one more fragment SecondFragment and layout as fragment_second.
Activity and Fragment changes:
Let's configure the activity and fragments. We will add two different colors to the fragments and add them to the activity.
I am adding a reddish color as the background for the FirstFragment. Below is the code for fragment_first:
<?xml version="1.0" encoding="utf-8"?><FrameLayout xmlns:android="http://schemas.android.com/apk/res/android"xmlns:tools="http://schemas.android.com/tools"android:layout_width="match_parent"android:layout_height="match_parent"android:background="#ED1414"tools:context=".FirstFragment"><TextViewandroid:layout_width="match_parent"android:layout_height="match_parent"android:gravity="center"android:textSize="30sp"android:textColor="@color/white"android:text="First Fragment" /></FrameLayout>
And blue for fragment_second:
<?xml version="1.0" encoding="utf-8"?><FrameLayout xmlns:android="http://schemas.android.com/apk/res/android"xmlns:tools="http://schemas.android.com/tools"android:layout_width="match_parent"android:layout_height="match_parent"android:background="#142AED"tools:context=".FirstFragment"><TextViewandroid:layout_width="match_parent"android:layout_height="match_parent"android:gravity="center"android:textSize="30sp"android:textColor="@color/white"android:text="Second Fragment" /></FrameLayout>
Now, we can add these two fragments to the activity_main.xml file.
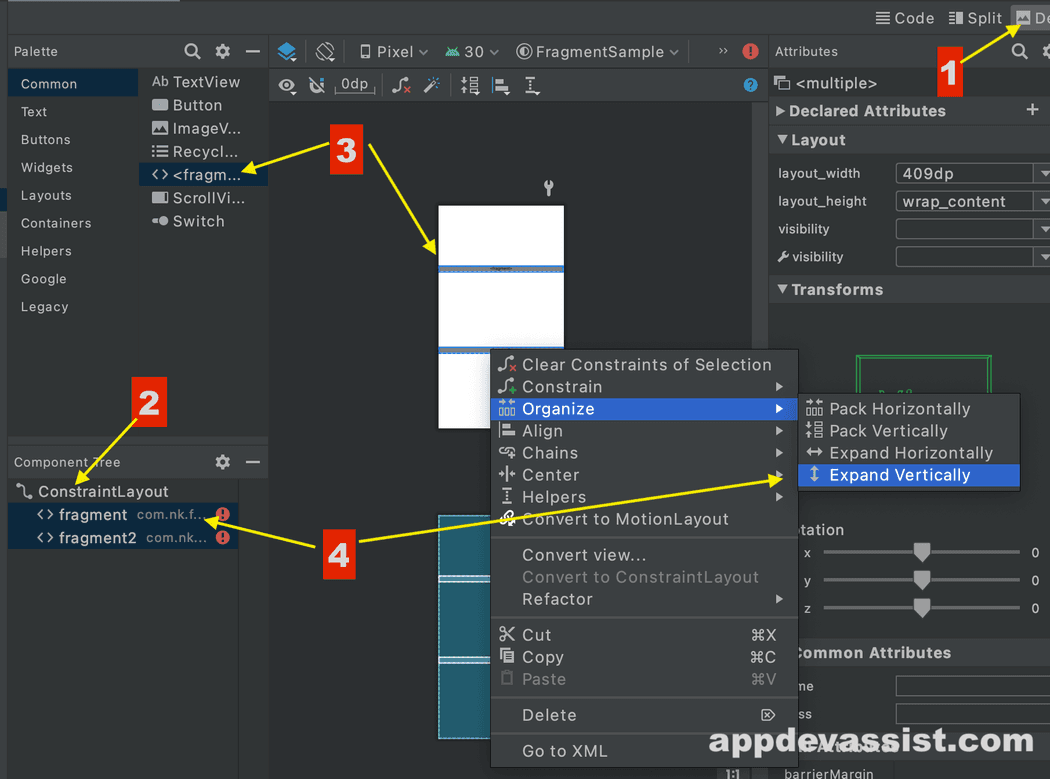
- Open activity_main.xml in Design tab.
- Make sure that ConstraintLayout is used as the parent layout here
- Drag one fragment component from the left side of the layout on the activity layout. It will ask you to select one fragment. Select FirstFragment. Do it again for SecondFragment.
- Select both fragments by clicking on Ctrl or Cmd key, right click on it -> select organize and click on Expand Vertically. Similarly, do it for Expand Horizontally.
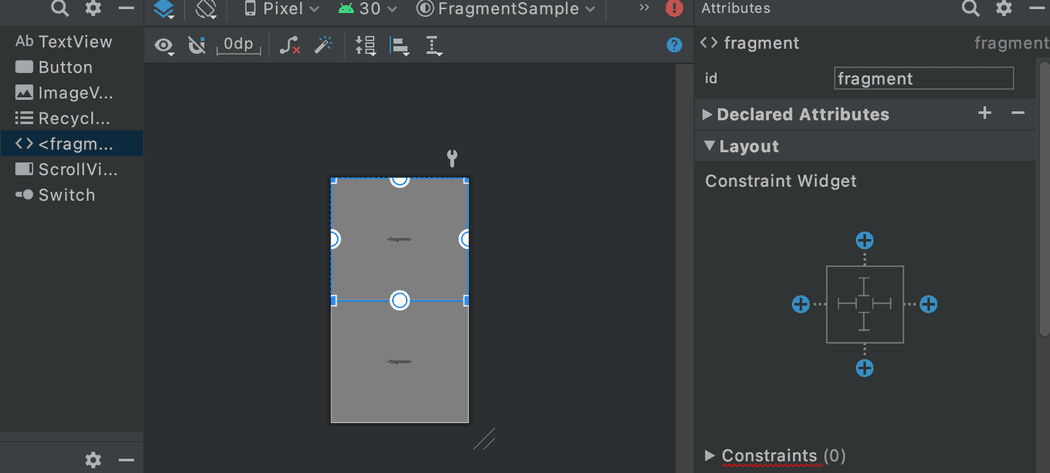
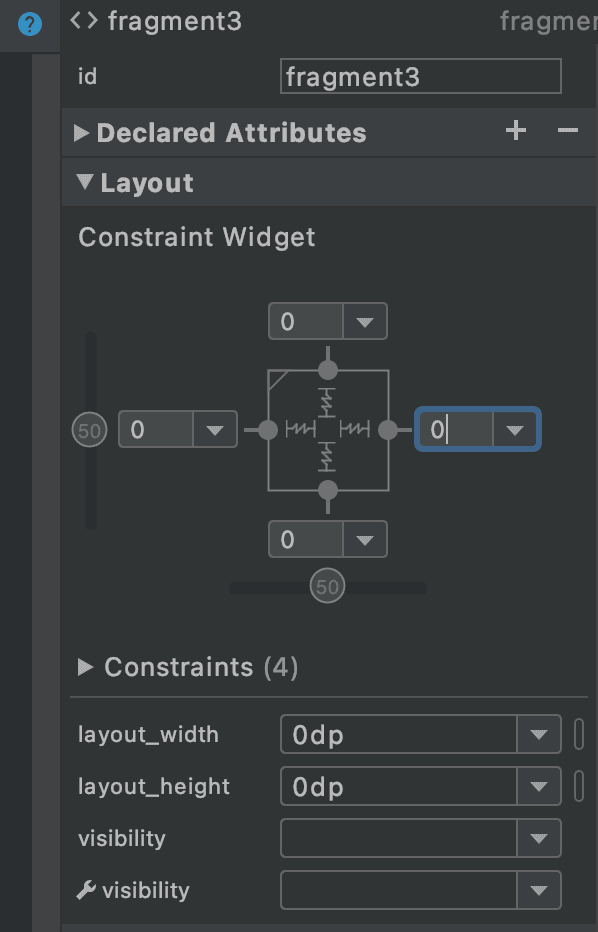
Once it is done, we need to provide constraints for the fragments. Click on one fragment and click on the + buttons on right side to add constraints for all directions. Do it for both fragments.
Also, add 0dp as layout height and width for both fragments.
Run the application:
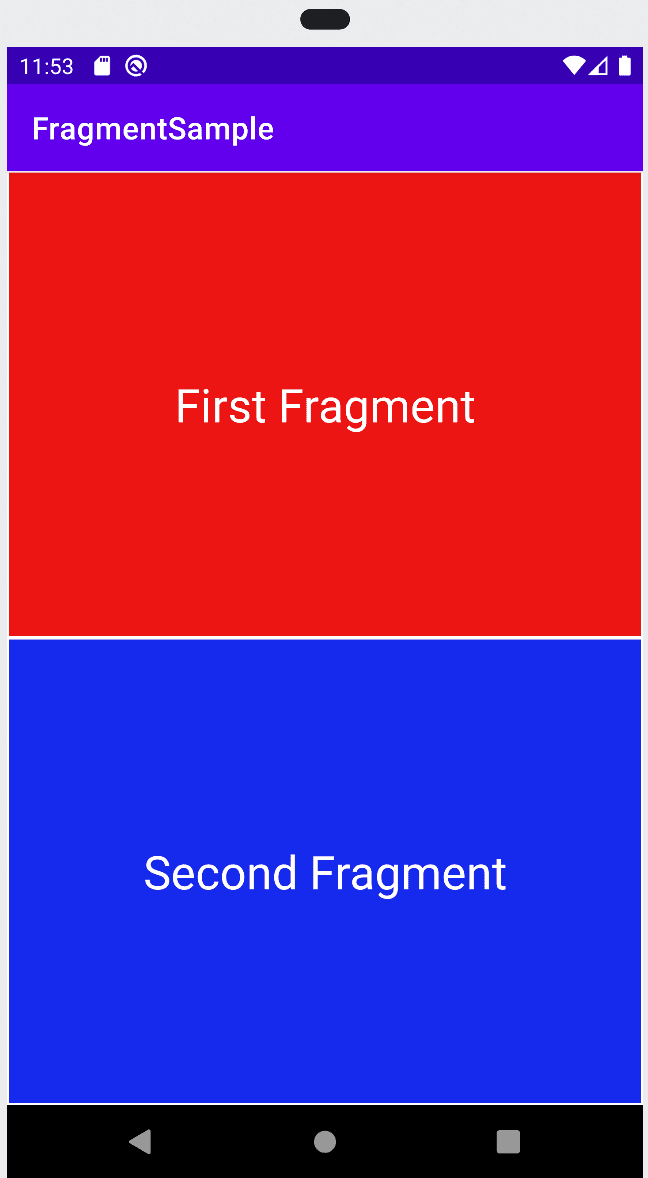
Run the app on an emulator or real android device. It will look as like below:
As you can see that both fragments are shown in the activity. We can add any other views in the fragments similar to an activity.
