Close
Close full mode
logoAppDevAssist

How to create a Floating Action Button in Android using Kotlin

How to create a Floating Action Button in Android using Kotlin:

In this post, we will learn how to create a Floating Action Button in Android Studio with Kotlin. If you are using Java, you can follow the same steps.

YouTube Video:

I have published one video on Floating Action Button. You can watch it here:

Android Studio project:

For this example, I will use one basic Android Studio project with one activity MainActivity.kt and its layout file activity_main.xml.

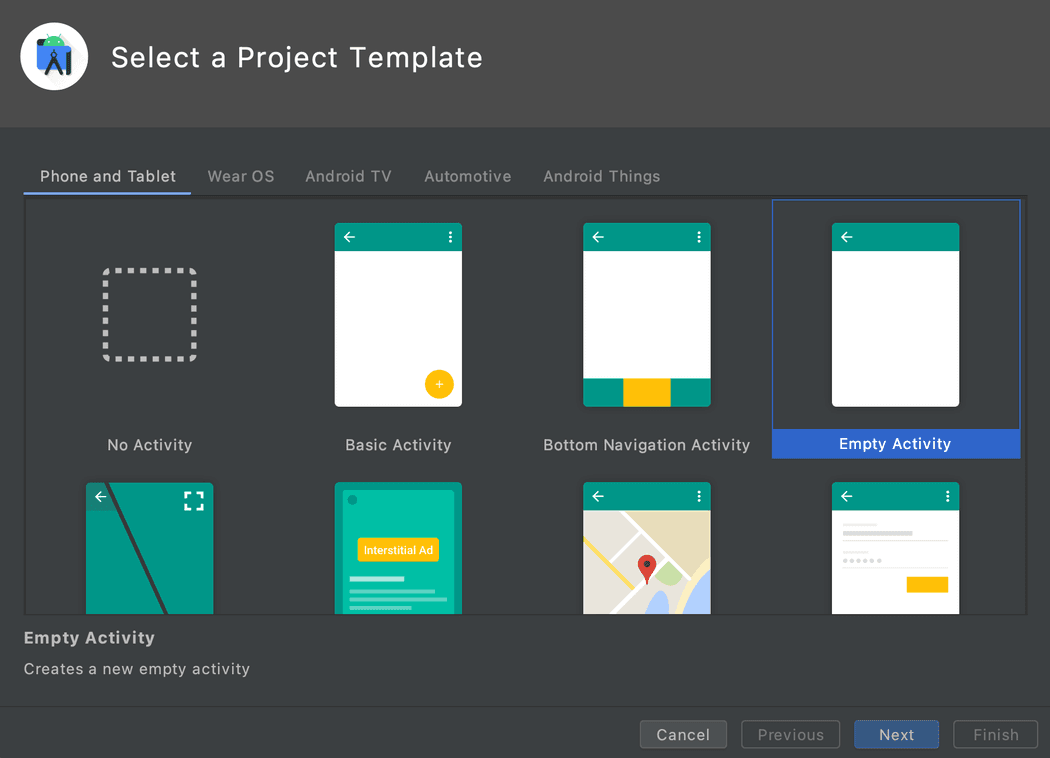
Open your Android Studio, click on Create a new project, choose Empty Activity, click on Next, fill the options and click on Finish to create the project.

Android studio new project

By default, it will create one activity file MainActivity.kt and one layout file activity_main.xml.

Building the UI:

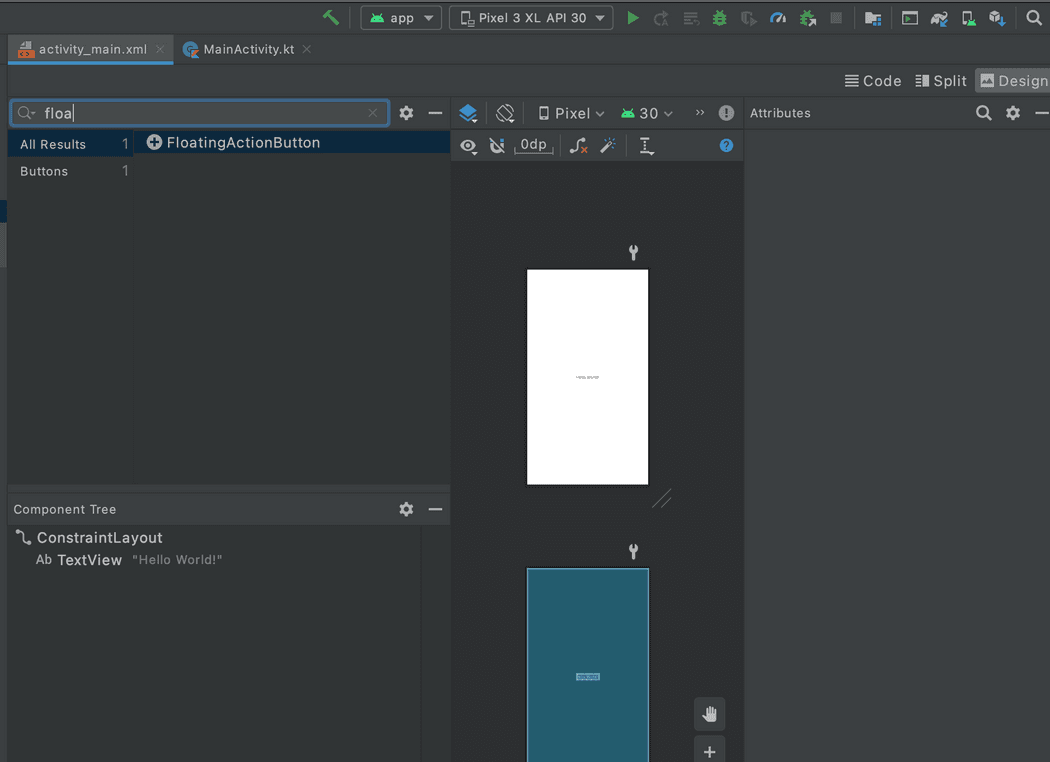
Open your activity_main.xml file in Design mode and search for Floating action button in the left search bar. It will show you the widget for Floating action button. Drag and drop it in the main layout UI.

Floating action button

This will open one new window, that will ask to pick a resource for the button.

You can select from any existing resource or you can click on the + button to create one new drawable, image or vector asset.
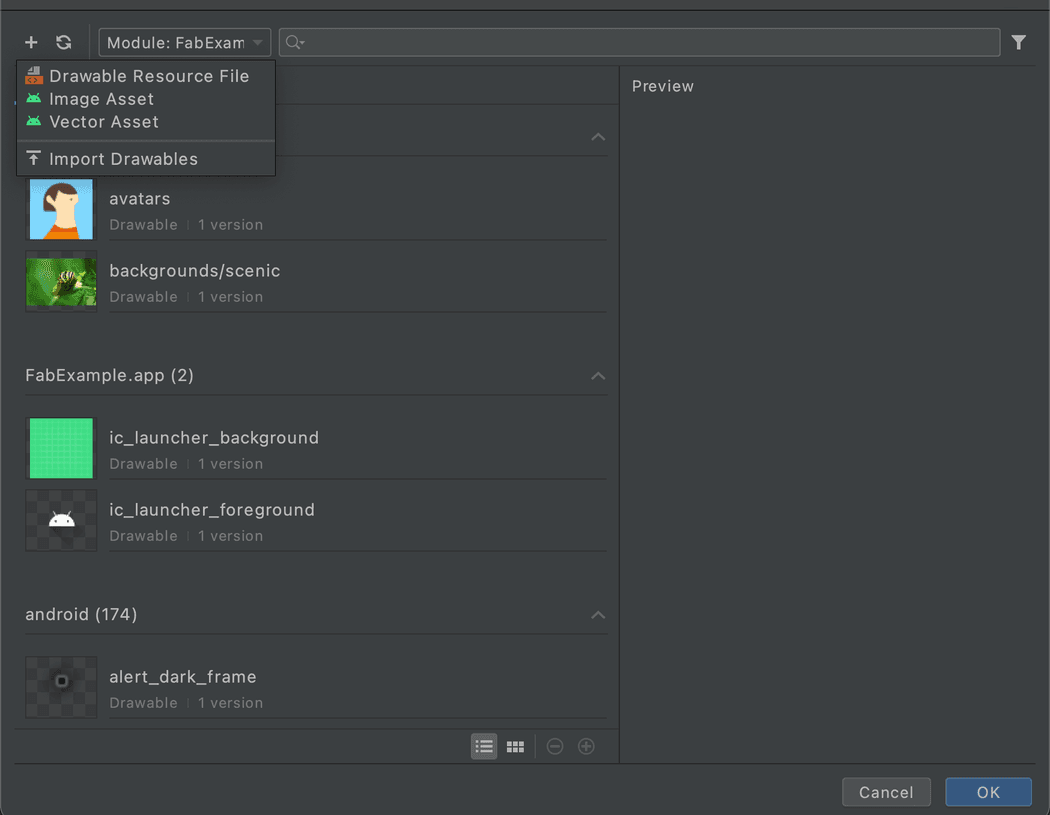
Android studio resource picker

Now, add the constraints to the floating action button and it will show it if you run the app in a simulator.

Below is the layout file for my project:

<?xml version="1.0" encoding="utf-8"?>
<androidx.constraintlayout.widget.ConstraintLayout xmlns:android="http://schemas.android.com/apk/res/android"
xmlns:app="http://schemas.android.com/apk/res-auto"
xmlns:tools="http://schemas.android.com/tools"
android:layout_width="match_parent"
android:layout_height="match_parent"
tools:context=".MainActivity">
<com.google.android.material.floatingactionbutton.FloatingActionButton
android:id="@+id/floatingActionButton"
android:layout_width="wrap_content"
android:layout_height="wrap_content"
android:layout_marginEnd="52dp"
android:layout_marginBottom="50dp"
android:clickable="true"
app:layout_constraintBottom_toBottomOf="parent"
app:layout_constraintEnd_toEndOf="parent"
app:srcCompat="@drawable/ic_baseline_add_24" />
</androidx.constraintlayout.widget.ConstraintLayout>

How to change the icon color and background color of a Floating action button:

Floating action button background color can be changed by changing the app:backgroundTint property and icon color can be changed by changing the app:tint property.

<com.google.android.material.floatingactionbutton.FloatingActionButton
android:id="@+id/floatingActionButton"
android:layout_width="wrap_content"
android:layout_height="wrap_content"
android:layout_marginEnd="52dp"
android:layout_marginBottom="50dp"
app:backgroundTint="@color/purple_700"
app:tint="@color/white"
android:clickable="true"
app:layout_constraintBottom_toBottomOf="parent"
app:layout_constraintEnd_toEndOf="parent"
app:srcCompat="@drawable/ic_baseline_add_24" />

It will change the background color and icon color of the Floating action button.

How to change the size of a Floating action button:

We have two predefined sizes for the Floating action button: mini and normal. We can use app:fabSize to change the size. For example:

<com.google.android.material.floatingactionbutton.FloatingActionButton
android:id="@+id/floatingActionButton"
android:layout_width="wrap_content"
android:layout_height="wrap_content"
android:layout_marginEnd="52dp"
android:layout_marginBottom="50dp"
app:backgroundTint="@color/purple_700"
app:fabSize='mini'
app:tint="@color/white"
android:clickable="true"
app:layout_constraintBottom_toBottomOf="parent"
app:layout_constraintEnd_toEndOf="parent"
app:srcCompat="@drawable/ic_baseline_add_24" />

How to add click listener to Floating action button:

We can use android:onClick to add a click listener method to a Floating action button. It works as like normal buttons.

<com.google.android.material.floatingactionbutton.FloatingActionButton
android:id="@+id/floatingActionButton"
android:layout_width="wrap_content"
android:layout_height="wrap_content"
android:layout_marginEnd="52dp"
android:layout_marginBottom="50dp"
app:backgroundTint="@color/purple_700"
android:onClick="onClickFab"
app:fabSize='mini'
app:tint="@color/white"
android:clickable="true"
app:layout_constraintBottom_toBottomOf="parent"
app:layout_constraintEnd_toEndOf="parent"
app:srcCompat="@drawable/ic_baseline_add_24" />

It will show red marked in the onClickFab. You can click Alt + Enter to create the method in the MainActivity file. It will create the method as like below:

class MainActivity : AppCompatActivity() {
override fun onCreate(savedInstanceState: Bundle?) {
super.onCreate(savedInstanceState)
setContentView(R.layout.activity_main)
}
fun onClickFab(view: View) {}
}

We can put code inside onClickFab method.

Subscribe to our Newsletter

Previous
How to implement long press to select an item in RecyclerView
Next
How to create RadioGroup and RadioButtons in Android