How to handle user interactions in Fragments
How to handle user interactions in Fragments:
If we have an Activity with a xml file, we can get reference to the views in the xml in the activity. For example, if we have one button, we can get reference to that button by using findViewById in the activity file.
But if we are using fragments to build our layouts, this needs to be done inside the fragments, not in the activity. Because, we can add or replace more than one fragment in a single activity.
This post will show you how to handle user interactions in a fragment in Android using Kotlin.
Video:
I have published one video on YouTube explaining these steps with an example. You can watch it here:
Android Studio project:
We will use one Activity with one Fragment in this project.
Open Android Studio and create one new project with one single Activity. Suppose it is :
- MainActivity.kt
- and its xml file is activity_main.xml
Create one new Fragment in this project. Suppose it is:
- FirstFragment.kt
- and its xml file is fragment_first.xml
Now let's update the layouts.
Layouts for the fragment and activity:
activity_main.xml:
Update your activity_main.xml file as like below:
<?xml version="1.0" encoding="utf-8"?><androidx.constraintlayout.widget.ConstraintLayout xmlns:android="http://schemas.android.com/apk/res/android"xmlns:app="http://schemas.android.com/apk/res-auto"xmlns:tools="http://schemas.android.com/tools"android:layout_width="match_parent"android:layout_height="match_parent"tools:context=".MainActivity"><FrameLayoutandroid:id="@+id/frameLayout"android:layout_width="match_parent"android:layout_height="match_parent"app:layout_constraintBottom_toBottomOf="parent"app:layout_constraintEnd_toEndOf="parent"app:layout_constraintStart_toStartOf="parent"app:layout_constraintTop_toTopOf="parent"></FrameLayout></androidx.constraintlayout.widget.ConstraintLayout>
Here, we have added one FrameLayout. The fragment will be attached to this FrameLayout.
fragment_first.xml:
Similarly, update your fragment_first.xml file as like below:
<?xml version="1.0" encoding="utf-8"?><androidx.constraintlayout.widget.ConstraintLayout xmlns:android="http://schemas.android.com/apk/res/android"xmlns:app="http://schemas.android.com/apk/res-auto"xmlns:tools="http://schemas.android.com/tools"android:id="@+id/constraintLayout"android:layout_width="match_parent"android:layout_height="match_parent"tools:context=".FirstFragment"><LinearLayoutandroid:layout_width="match_parent"android:layout_height="match_parent"android:gravity="center"android:orientation="vertical"app:layout_constraintBottom_toBottomOf="parent"app:layout_constraintEnd_toEndOf="parent"app:layout_constraintStart_toStartOf="parent"app:layout_constraintTop_toTopOf="parent"><TextViewandroid:id="@+id/textView"android:layout_width="wrap_content"android:layout_height="wrap_content" /><EditTextandroid:id="@+id/editText"android:layout_width="wrap_content"android:layout_height="wrap_content"android:layout_marginTop="20dp"android:ems="10" /><Buttonandroid:id="@+id/button"android:layout_width="wrap_content"android:layout_height="wrap_content"android:layout_marginTop="20dp"android:text="Button" /></LinearLayout></androidx.constraintlayout.widget.ConstraintLayout>
Here,
- We have added one TextView, one EditText and one Button.
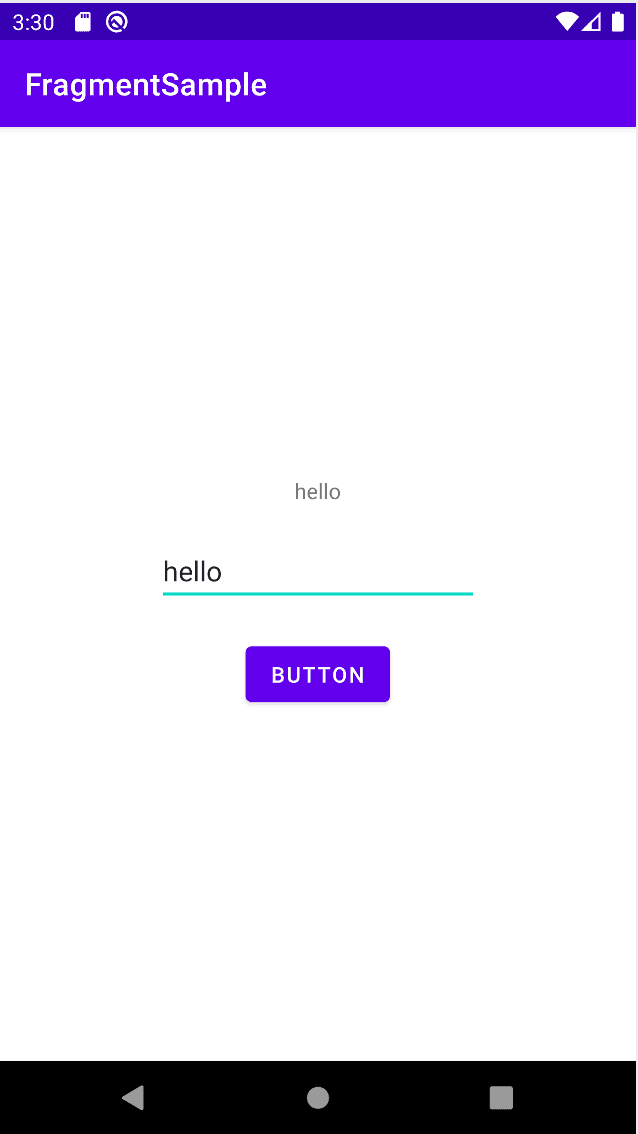
- We will read the data added to the EditText and on clicking the button, we will show it in the TextView.
MainActivity.kt:
Update your MainActivity.kt file as below:
import androidx.appcompat.app.AppCompatActivityimport android.os.Bundleclass MainActivity : AppCompatActivity() {private val fragmentManager = supportFragmentManageroverride fun onCreate(savedInstanceState: Bundle?) {super.onCreate(savedInstanceState)setContentView(R.layout.activity_main)val fragmentTransaction = fragmentManager.beginTransaction()fragmentTransaction.add(R.id.frameLayout, FirstFragment())fragmentTransaction.addToBackStack(null)fragmentTransaction.commit()}}
Here, we are adding the FirstFragment to the frameLayout inside onCreate. So, once you run the app, it will show the FirstFragment fragment.
FirstFragment.kt:
Below is the code for FirstFragment:
import android.os.Bundleimport androidx.fragment.app.Fragmentimport android.view.LayoutInflaterimport android.view.Viewimport android.view.ViewGroupimport android.widget.Buttonimport android.widget.EditTextimport android.widget.TextViewclass FirstFragment : Fragment() {override fun onCreateView(inflater: LayoutInflater, container: ViewGroup?,savedInstanceState: Bundle?): View? {// Inflate the layout for this fragmentval layout = inflater.inflate(R.layout.fragment_first, container, false)val editText: EditText = layout.findViewById(R.id.editText)val textView: TextView = layout.findViewById(R.id.textView)val button: Button = layout.findViewById(R.id.button)button.setOnClickListener {textView.text = editText.text}return layout;}}
All view related references and actions are written inside onCreateView. We can use findViewById with the layout variable.
If the button is clicked, it is assigning the text of the EditText, that is entered by the user to the TextView.
If you run the app, it will give one result as like below:

If you enter anything in the EditText and click on the button, it will show that text in the TextView.
